Crafts like this super simple rainbow wand craft are absolutely the best!
Created by your kiddos (with parental supervision) these wands give your child extra supplies for hours of pretend play!
We love rainbows at our house — they represent vibrant colors, unbroken promises from God and pure happiness!
If you’re a fan of rainbows, you’ll love our easy rainbow cookies and our paper plate rainbow crafts!
Did I mention these rainbow wands are perfect for St. Patrick’s day?
St. Patrick’s is a unique holiday that families can truly appreciate celebrating!

And, if you’re a St. Patty’s day fan, you’ll love our
End of the Rainbow trail mix that’s crazy easy to whip up!
When we baby-sit a whole lot of munchkins we almost always grab out the paints, make some homemade smocks and create fun and magical memories!
Giving little ones crafts to focus on keeps them busy, happy, entertained and thinking!

And the best part?
Letting toddlers and preschoolers admire their finished craft and even PLAY with it!
We may or may not have an ever-growing stash of pretend play costumes and props for our kiddos. Imagination in childhood is such a special gift!
If you’re looking for more preschool activities, we have a HUGE page you can check out and bookmark for those days when you want to connect and make memories with your munchkins! Check it out here!

Super Simple Rainbow Wand Craft
Materials:
- Craft paint
- Paintbrush
- Thick white card stock or cardboard
- Glue
- Glitter in rainbow colors
- 12 inch wooden dowels
- Ribbons in rainbow colors
- White paper
- Pencil
Instructions:
- Drawing a rainbow shape onto a piece of white paper. You can draw it to any size that you would like to form the base for your wand.
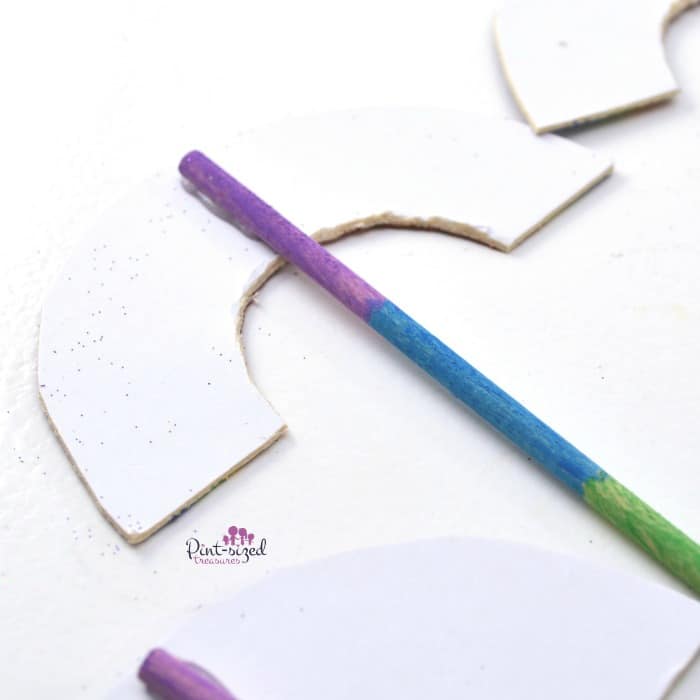
- Cut out the rainbow and trace it onto a piece of thick white cardstock or cardboard.
- Cut out the rainbow shapes from the white cardboard.
- Use a paintbrush to paint on a thin layer of glue to the very inside layer of the rainbow. This will be where you apply the first color of glitter in your rainbow.
- Sprinkle red glitter onto the thin glue semi-circle on your cardboard rainbow. Knock off the excess and set the rainbow aside to dry.
- In between coats of glitter, use craft paint to paint the wooden dowels in stripes of color. You can view the photos for reference on how to do this.
- Continue to add different layers of glitter to your cardboard rainbows, overlapping the glue onto each layer and creating a new thin layer of glue for the next color of glitter. Repeat this until you have covered the entire cardboard rainbow in glitter, allowing the glitter to dry in between layers.
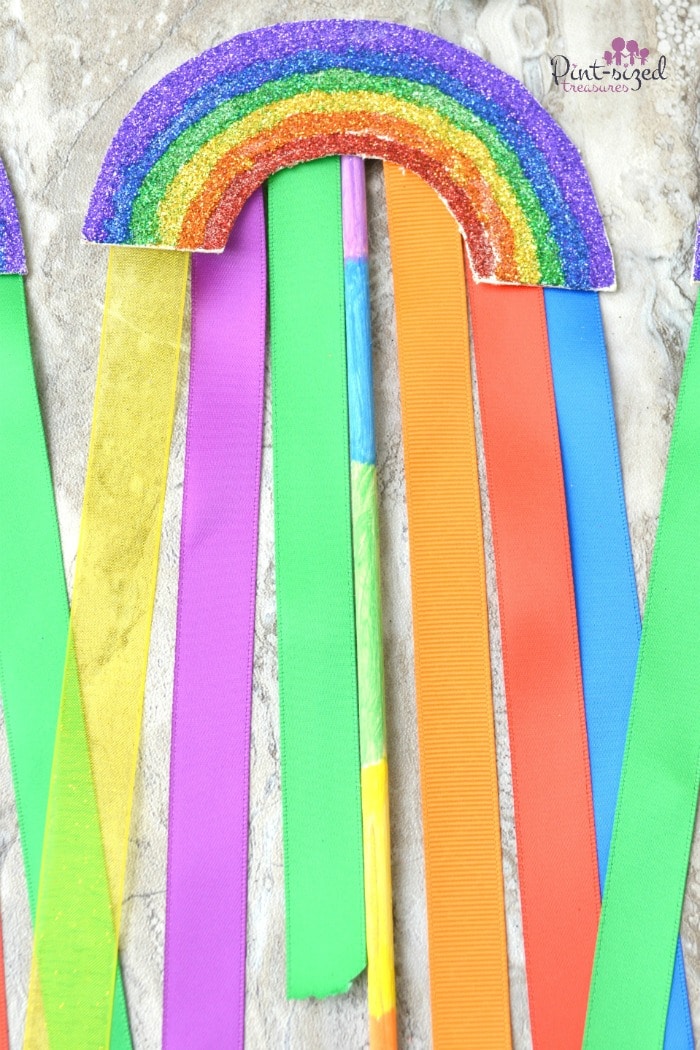
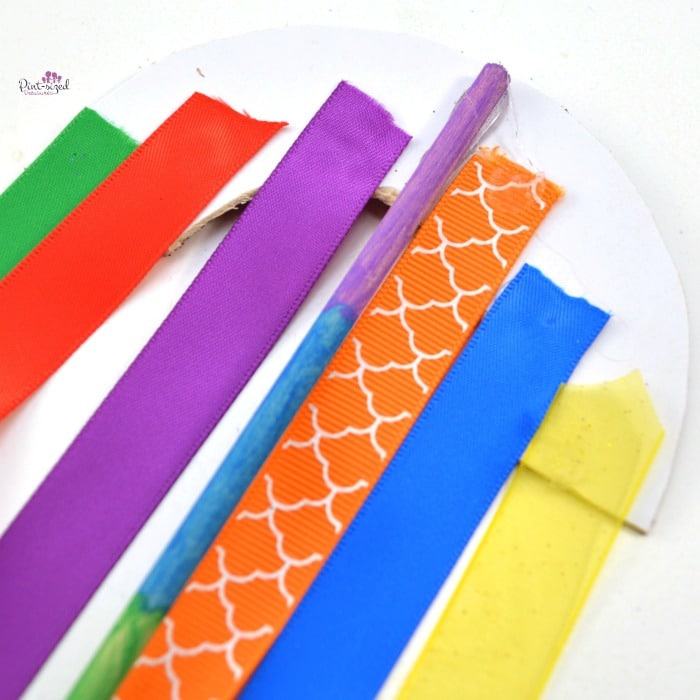
- Once dry, glue a painted wooden dowel to the back of each glitter rainbow.
- Cut different lengths of rainbow colored ribbons.
- Use glue to attach different colored ribbons to the back of each glitter rainbow so that they hang down.
- Wait for the rainbow wand to dry completely before allowing kids to play with their craft.
- Now go PLAY!!