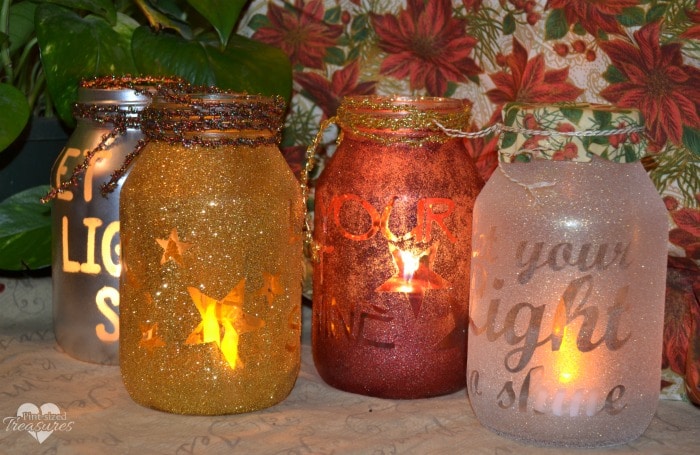
Christmas Luminaries are Simple to Make!
Holiday luminaries are a simple, yet elegant way to decorate your home for the holidays — diy style!
Don’t worry!
This holiday craft won’t soak up all your precious time, and you can even get the kiddos involved!
Luminaries are Perfect for DIY Christmas Decor
A major part of the holiday season is knowing how to add that special holiday touch to your home — whether it’s the food, the scents, or the decor — you want everything to be simply perfect!
My friend Stephanie has a great idea to get the “how” part of your decorating done.
Unlike me, she is a crafting mom!
She is always coming up with new ideas and projects.
You will probably be hearing much more from her in the future as she continues to shares her great diy projects, yummy recipes and kid-friendly crafts!
Here’s what inspired her to make the cute, mason jar luminaries:
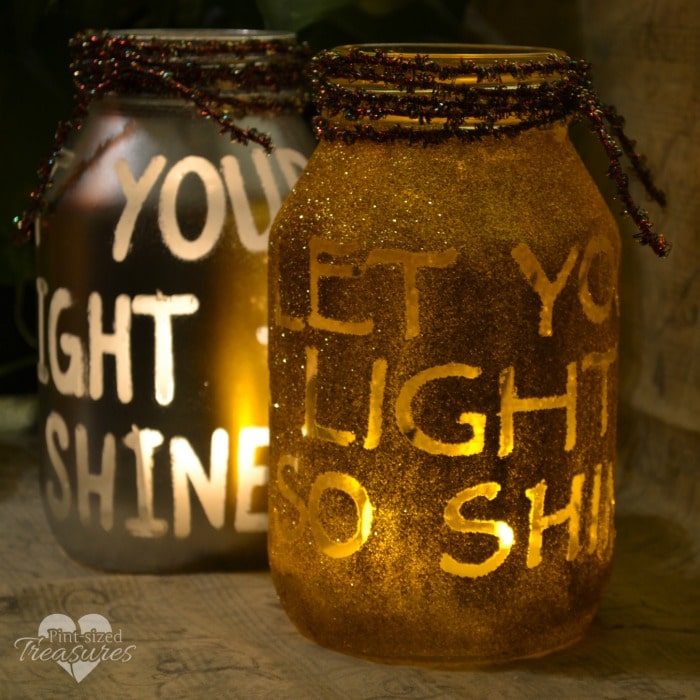
While searching for a craft theme this year I saw a picture of a star over a manger. I began to imagine what is was like when the wise men followed that great light to find Jesus. In Matthew 5:14 Jesus said, “Ye are the light of the world.” Verse 16 continues with this thought and instructs us to “Let your light so shine before men.” We should shine in this dark world, just as the star so long ago was shining to guide others to Jesus. May this simple craft remind you to shine for Christ — during the holidays and everyday!
Ready to tackled this fun project? Instructions follow!
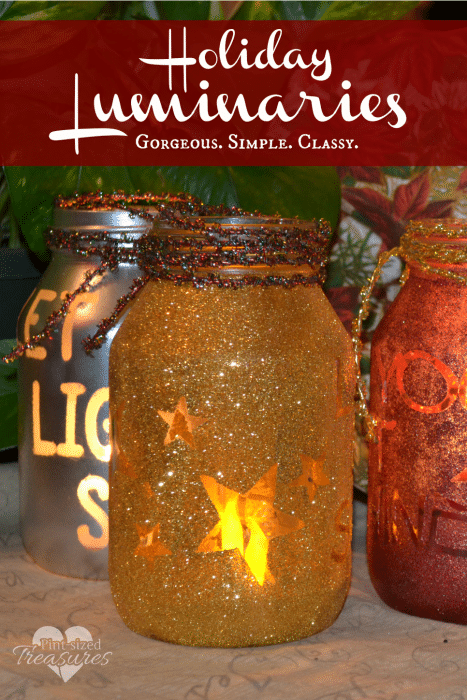
Simple Holiday Luminaries
Materials Needed:
- mason jars – washed and cleaned with alcohol
- glue
- fine glitter
- paper plate
OR – paints of your choice
- 2 inch removable vinyl letters and star shapes (found at craft stores or sign shops)
- clear sealing spray (Krylon or Mod-podge found with the craft and paint supplies)
- electric or candle tea lights
- ribbon or fabric to cover the top depending on which light you choose. (Refrain from using a flammable item on top if you are using a real candle.)
Directions:
First, apply the vinyl letters to the jar. Apply the star designs as many as desired. If using glitter start by pouring a large amount of glitter into your paper plate. Now, thin glue with a few drops of water. Apply glue to the entire jar with a foam brush. You need to move fast so the glue does not dry. As soon as you have covered the jar with glue, roll the jar in the plate of fine glitter. Press the glitter firmly into the glue. If you are in a hurry you can pull the lettering off at this point and spray with sealer. As soon as the jar is dry, you are ready to decorate the top with your choice of ribbon and fabric. Drop in your choice of candle.
Note: Instead of glitter you can use spray paint. It is not as messy and you don’t run the risk of getting glue under the letters which makes them more difficult to remove. Just apply your design spray with your paint and let dry. When dry, use an x-acto knife to lift the vinyl off the jars. As a finishing touch you can apply glass paint where the letters were to illuminate the letters. Decorate the top with ribbon or fabric and drop in your choice of candle.
Want to grab another beautiful jar idea? Check out these Stained Glass Beauties that are made with sharpies!
*Affiliate links have been added for your crafting convenience.*